Essential Tips for Effective Drywall Fixing and Installment Strategies
Reliable drywall repair and setup needs a cautious approach. Comprehending the sorts of drywall and having the right tools is important. Appropriate methods and accurate dimensions can substantially impact the result. Several ignore crucial actions like taping and sanding, which can make or break the last appearance. As jobs proceed, common obstacles may occur that require focus. Discovering these tips can result in an extra sleek and successful surface.
Comprehending Different Kinds of Drywall
Understanding the different kinds of drywall is necessary for any kind of successful fixing or setup project. Drywall, commonly understood as plaster board, comes in several varieties tailored for specific applications. Standard drywall is the most commonly made use of type, suitable for general interior walls and ceilings. Moisture-resistant drywall, commonly environment-friendly in color, is made for areas vulnerable to moisture, such as kitchen areas and shower rooms. Fire-resistant drywall, usually colored pink or purple, is crafted to withstand greater temperature levels and is typically utilized in garages or near heaters. Additionally, soundproof drywall assists reduce noise transmission, making it appropriate for multi-family homes or taping workshops. Specialty drywall, like cement board, is used in damp areas like showers or tub surrounds. Recognizing these kinds aids in picking the appropriate product for every project, making sure toughness and performance out of commission or new setups.
Vital Tools for Drywall Fixing and Setup
Having the right tools is vital for efficient drywall repair and installation. A high quality utility blade is critical for cutting drywall sheets specifically. A drywall T-square helps assure straight edges, while a taping blade is essential for using joint substance efficiently over seams. Additionally, a drywall saw permits reducing out damaged areas or suitable drywall around fixtures.
For hanging drywall, a power drill with drywall screws is vital, as it enables quick and safe installation. A degree is likewise important to verify that the drywall is straight and correctly aligned. Once it has actually dried out, a sanding block or post sander is important for smoothing out joint compound. Lastly, a determining tape is essential for accurate dimensions, stopping waste and guaranteeing a proper fit. Outfitted with these devices, individuals can take on drywall projects properly, causing professional-looking outcomes.
Step-by-Step Guide to Fixing Holes and Cracks
When attending to holes and fractures in drywall, having the right devices and products is essential for an effective fixing. This overview lays out the essential things and supplies a clear, detailed procedure to properly bring back the surface. Recognizing these elements will assist ensure a smooth surface and resilient outcomes.
Devices and Materials Needed
A well-equipped toolkit is vital for effective drywall fixing and installation. Trick devices consist of an energy blade for cutting drywall, a measuring tape to guarantee precise sizing, and a drywall saw for larger openings. A putty knife is vital for using joint compound smoothly, while a sanding block or pole sander aids accomplish a smooth coating. For patching, a roll of fiberglass harmonize tape or paper tape is essential to reinforce joints. Additionally, a drill and screws are required for securing new drywall items. Important products are composed of joint compound, guide, and paint to finish the fixing. Having these devices and materials handy ensures a smoother, a lot more effective repair service procedure, producing professional-looking results.
Fixing Process Actions
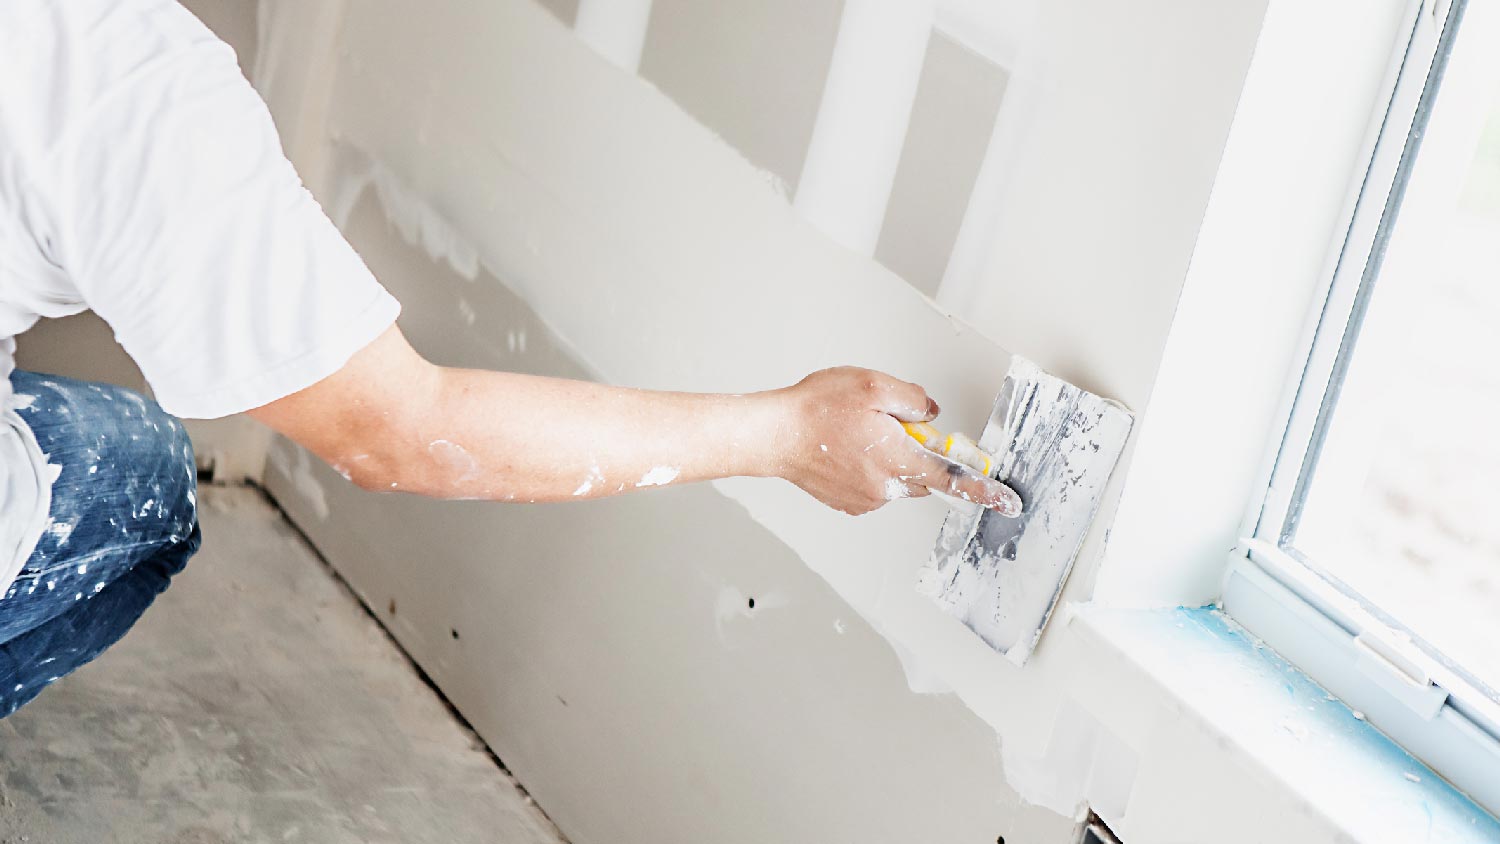
Fixing openings and splits in drywall calls for an organized strategy to guarantee a seamless finish. The location bordering the damage should be cleaned up completely to get rid of dust and debris. Next, for tiny cracks, a putty knife is used to use a joint compound evenly over the location. For bigger openings, a patch is necessary; the harmed section is reduced out, and a brand-new item of drywall is fitted in place, protected with screws. As soon as the spot is in position, joint substance is used to blend the sides. After drying out, sanding the location smooth is important. The fixed surface area needs to be topped and repainted to match the surrounding wall surface, guaranteeing a low-profile repair service.
Techniques for Putting Up Drywall Panels
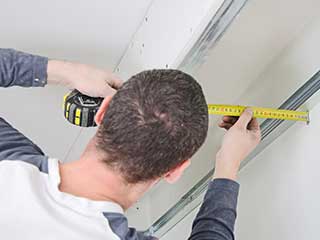
Installing drywall panels needs cautious planning and exact implementation to ensure a specialist and smooth surface. Initially, it is necessary to measure the wall surface room precisely and cut the panels to fit, making certain that they align with the studs. Placing the panels flat is commonly advised, as this can improve the structural integrity and reduce the variety of joints.
Using drywall screws, installers should protect the panels every 16 inches along the studs, guaranteeing a company hold. It is vital to avoid overdriving the screws, which can damage the paper surface area. For edges and edges, using an energy blade enables tidy cuts and a snug fit.
Completing Touches: Taping, Mudding, and Fining sand
As soon as the drywall panels are safely in place, the following crucial action involves the finishing touches of taping, mudding, and sanding. Insulation get more info is essential for creating a smooth change in between panels and hiding joints. A top quality drywall tape, either paper or fiberglass mesh, must be applied over the seams, guaranteeing it adheres properly to the mud that will certainly be used next.
Mudding, or applying joint substance, adheres to the taping procedure. This substance fills gaps and smooths out the surface. An initial coat should be used kindly, feathering the sides to blend with the drywall. After the first coat dries out, subsequent layers might be required for a flawless coating.
Sanding is essential to accomplish a smooth surface. A fine-grit sandpaper must be made use of to gently smooth out any flaws. Care should be required to stay clear of over-sanding, which can damage the drywall - Drywall Repair Ogden UT. Appropriately carried out, these completing touches produce a specialist appearance prepared for paint
Tips for Preserving Your Drywall After Installation
Keeping drywall after setup is essential to protecting its look and architectural integrity. Routine cleansing is essential; dirt and dust can gather, so gentle cleaning with a damp towel is advised. Property owners need to also check for any kind of indications of wetness or mold and mildew, particularly in high-humidity areas like shower rooms and cooking areas. If any kind of damages takes place, it is very important to address it promptly to avoid more issues.
Using furnishings pads can aid stop scrapes or damages from heavy items. In addition, painting the drywall with a top notch, cleanable paint supplies an extra layer of security and makes future cleansing simpler. Stay clear of making use of unpleasant cleaners or devices, as these can damage the surface. Finally, preserving a steady interior environment with proper humidity levels will help stop deforming or fracturing with time. By following these pointers, one can guarantee that drywall continues to be in outstanding problem for many years ahead.
Frequently Asked Inquiries
How Lengthy Does Drywall Take to Totally Dry After Setup?
Can I Set Up Drywall Over Existing Drywall?
Yes, drywall can be set up over existing drywall, however it is crucial to guarantee the underlying surface is protected and sufficiently prepared. This approach can enhance insulation and lower setup time, though it may include weight.
What Is the most effective Method to Soundproof Drywall?
The best means to soundproof drywall entails using specialized soundproofing products, such as resilient networks, acoustic caulk, and sound-dampening drywall. These methods successfully lessen sound transmission in between areas, enhancing general acoustic efficiency in living areas.
Exactly how Do I Select the Right Drywall Thickness?
To pick the appropriate drywall thickness, consider the application and area. Standard domestic walls typically make use of 1/2 inch, while ceilings or specialized areas might call for 5/8 inch for additional stamina and soundproofing abilities.
Exist Eco-Friendly Drywall Options Available?
Yes, eco-friendly drywall options are offered. These include items made from recycled products, plaster boards with reduced unstable natural compounds (VOCs), and those making use of sustainable production procedures, using environmentally-conscious choices for building and construction and improvement tasks.
Having the right devices is essential for efficient drywall repair service and installment. For hanging drywall, a power drill with drywall screws is vital, as it enables protected and fast installation. Secret devices include an energy blade for reducing drywall, a tape step to guarantee precise sizing, and a drywall saw for bigger openings. Yes, drywall can be installed over existing drywall, however it is vital to assure the underlying surface area is secure and properly prepared. The ideal means to soundproof drywall involves using specialized soundproofing materials, such as durable networks, acoustic caulk, and sound-dampening drywall.